Data collection can be automated in a consistent and automated manner with the help of online forms, which are easy to implement and secure. It is easy to create fully responsive online forms that capture and store data instantly using the right online form creation tool.
Forms.io, as a custom form builder, lets you create responsive online forms with more themes with its intuitive drag-and-drop interface, without the use of a single line of code.
Go to infinity.500apps.com > Find Productivity on the top section of the suite > Select Forms.io from the dropdown option under Productivity

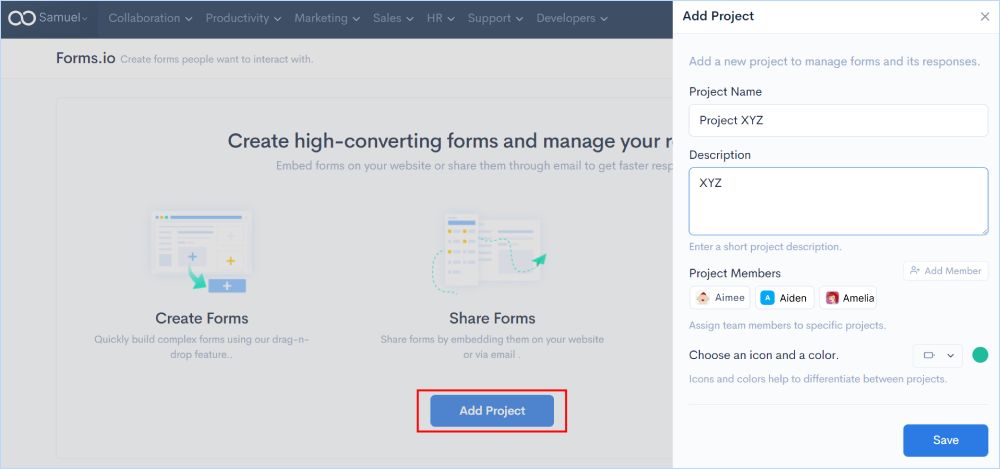
Start adding new projects to the workspace by giving them a specific name, description, and unique icon.
Click on Add Project and find the window (Add Project) to give project details.
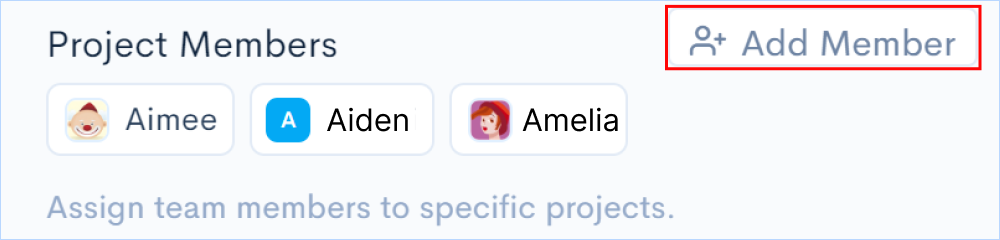
Add project team members from the existing list or invite them through the mail.
Click on Add Member from the Add Project window.
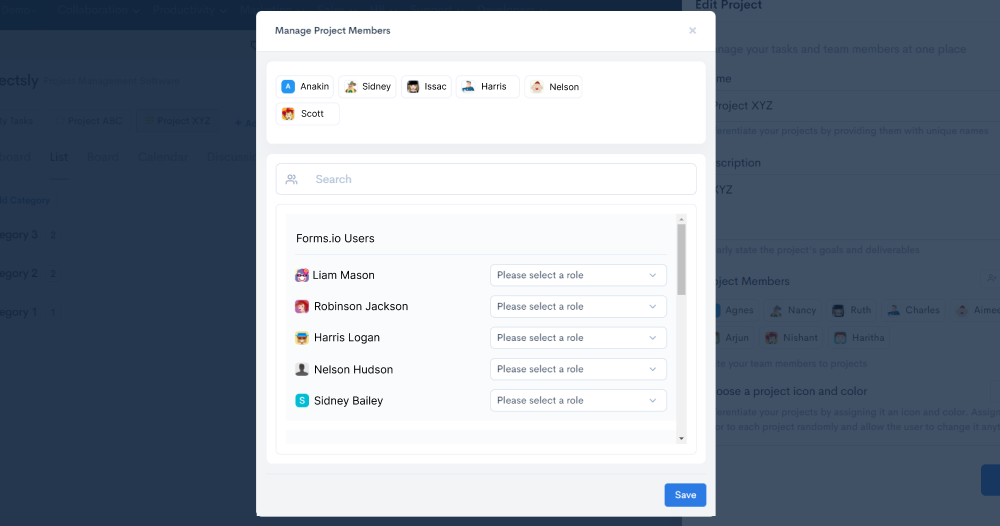
Assign specific roles to each member by adding them to the project. Once the members are chosen, click on Save.
You will enter into the workspace of Forms.io where you’ll be displayed with all features of the application.
If you want to make changes to the project you have created in terms of name, description, more members to be added or remove, you'll get the edit option to do the same. Hover over the project you have newly created and you'll find the Edit and Delete options. Click on the Edit button to make changes to the above mentioned details or click on the Delete button to remove the project you have created.

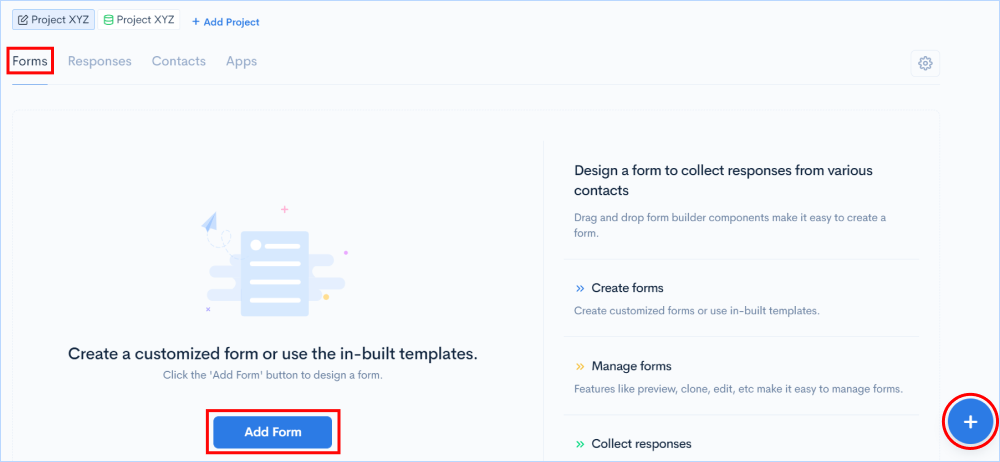
Let’s start building a web form to send to users and collect responses from them.
Go to Forms in the features tab > Click on Add Form or on the ‘+’ button on the right bottom of the workspace.
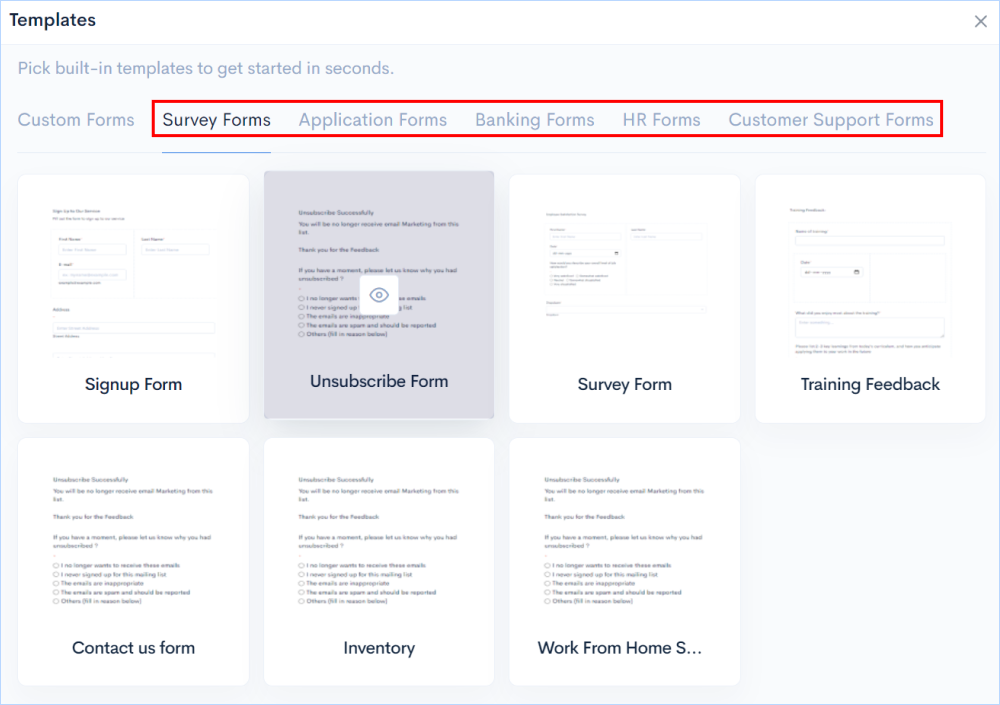
Choose from pre-built templates by clicking on the cards or you can create your custom workflows. There are more than 30 ready-to-use form templates in the library for various business purposes, such as survey forms, application forms, HR forms, banking forms, and customer support forms.
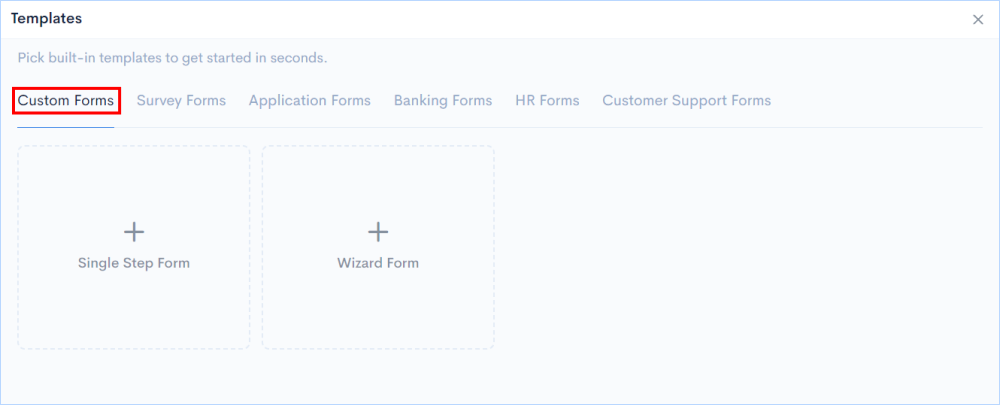
By using the custom options, you can design your own forms from scratch, either as a Single-step form or wizard form.
Forms.io provides an easy drag-and-drop visual builder to create customizable forms without needing any coding skills. You will find form components on the left side of the builder and a workspace to build the form on the right side. To start creating the form, just drag the components and drop them into the workspace.

Fields that are on the form can be modified based on the information, themes, and validations. You can also drag and drop the fields anywhere on the form and also clone them to add more similar fields.
Hover over any field and you’ll find a tab with multiple options. Click on Edit and you’ll find a window to make changes to the field.

Depending on the information your form's visitors provide, Form Conditions change the content shown to them. As contacts fill out your form, conditions dynamically hide and reveal form blocks and sections, improving the user experience by reducing effort and time.
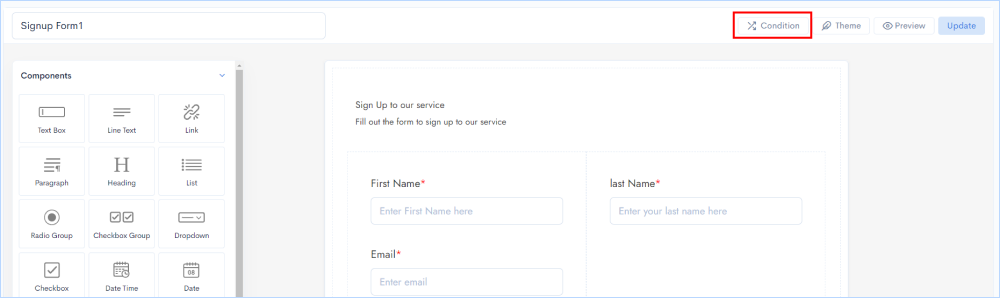
Go to Condition on the top right of the workspace > Click on Add Conditions
You’ll find a window displaying the form conditions you want to apply to the fields, once done click on Save.

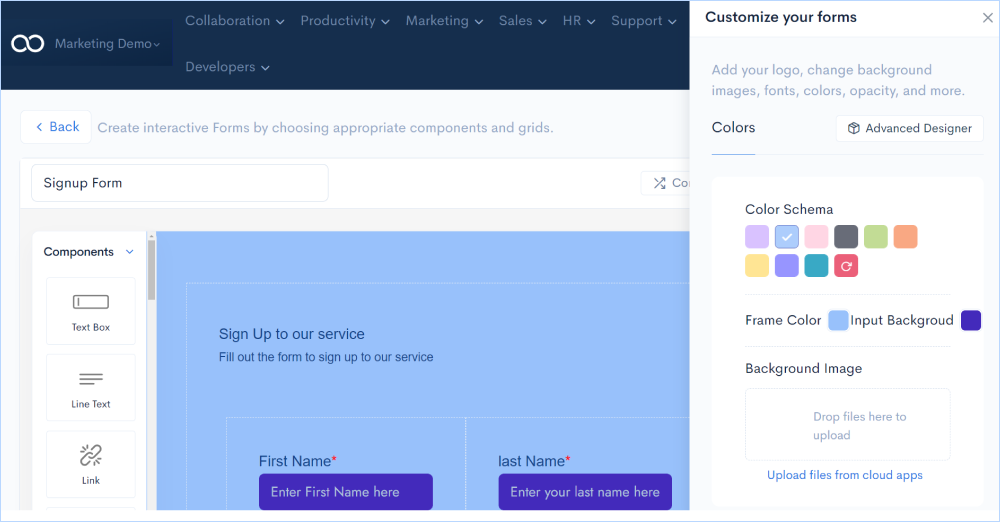
Make your forms appealing to users with advanced theme options letting you build the most engaging online forms.

Go to Theme on the top right of the workspace. You will get a window with multiple options to apply the theme to your form.
With the theming options, you can completely customize your form by change the colour of the form, add logos, insert background images and even you can choose the Advanced Designer option where you can change Fonts, Label styles and also CSS options.
You can preview the form you are working on at any time to see how it looks when you send it to the customer.
Go to Preview on the top right of the workspace.
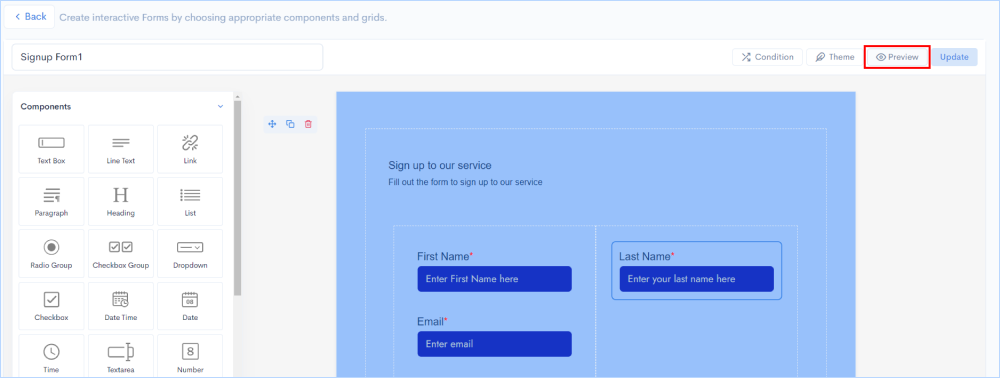
When you preview the form, a new window will be opened showing how the form will look to the end user.
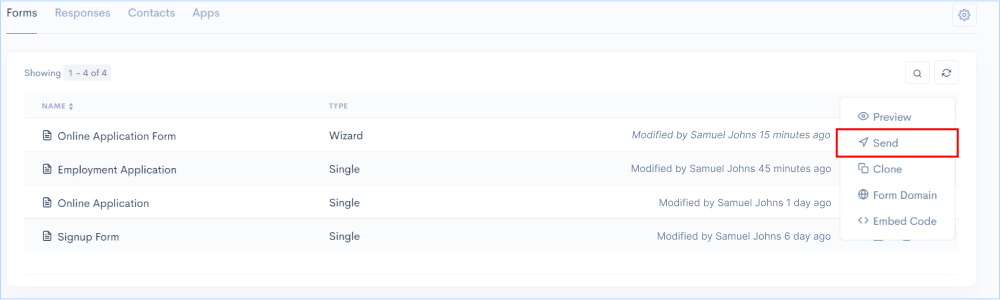
Send the forms to users/customers through email along with important notes.
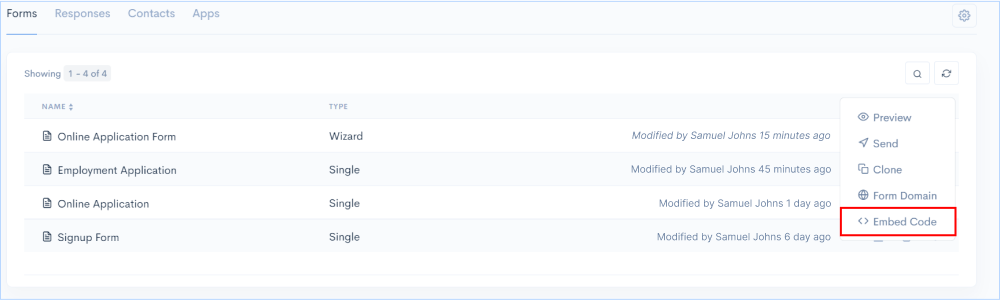
Go to Forms tab > click on the menuKebab (3 vertical dots) on the tab of the form you want to embed > Click on Send.
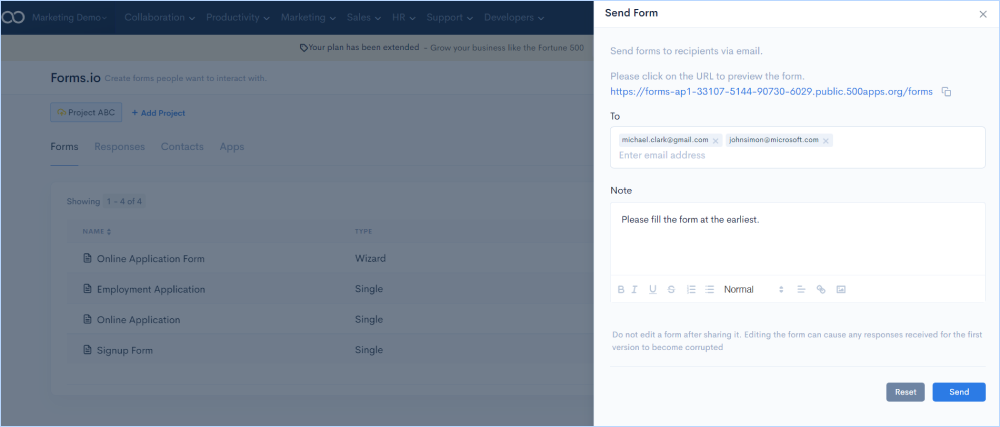
Upon clicking on the send option, you’ll find a window where you can add Email IDs of users whom you want the form to be received. You have a section to add notes while sending the email. Click on Save.
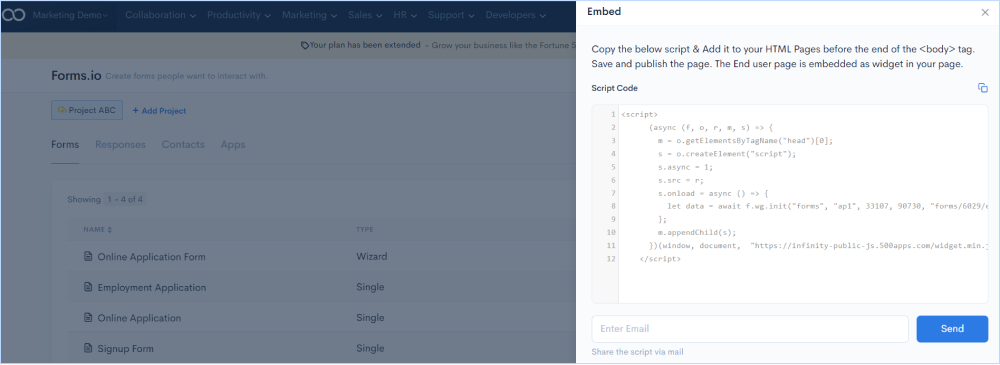
Incorporate forms on any web page and collect subscriber information easily by inserting HTML code.
Go to Forms tab > click on the Kebab menu (3 vertical dots) on the tab of the form you want to embed > Click on Embed Code
Once you click on Embed Code icon, you will get a window with a script to be embedded on the web page. Copy the script & add it to the HTML Pages before the end of the
tag. Save and publish the page. The End user page is embedded as widget in your page.You can also share the script via email to anyone who can embed the script on your web page.
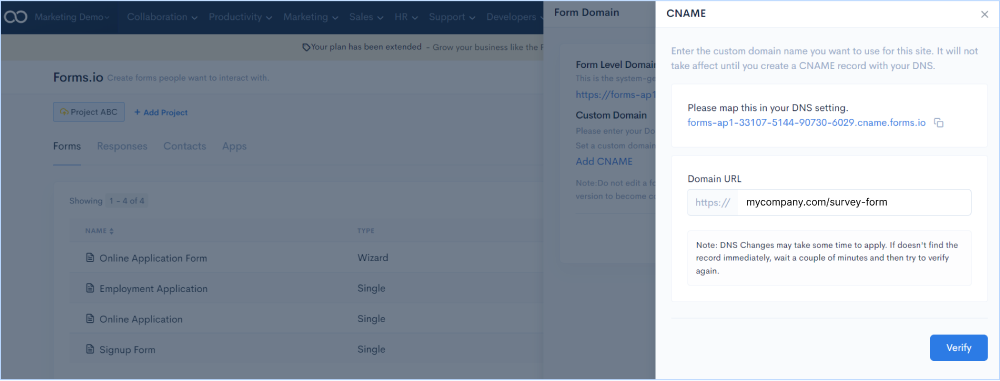
With Custom Domains, you can promote your organization's brand in the URLs of your forms. You can use a custom domain if you don't want any reference to Forms.io in your form URL.
Click on the gear button on the right hand side of the workspace > Click on Domain

Enter the custom domain name exclusively for your business to be incorporated in the Form URL. It will not take effect until you create a CNAME record with your DNS.
After clicking on Domain you will get a window showing default subdomain and the option to add CNAME.
Click on Add CNAME. You will get another window where you will find the URL from Forms.io to map in your DNS setting. Then add the domain URL you own in the action provided.
To enhance the experience of using this enterprise-grade forms builder. We offer webhooks too. You can configure these webhooks in an event such as inbound and outbound calls, Employee onboarding and integrate them with the other apps too. These triggers can come really handy for any business.
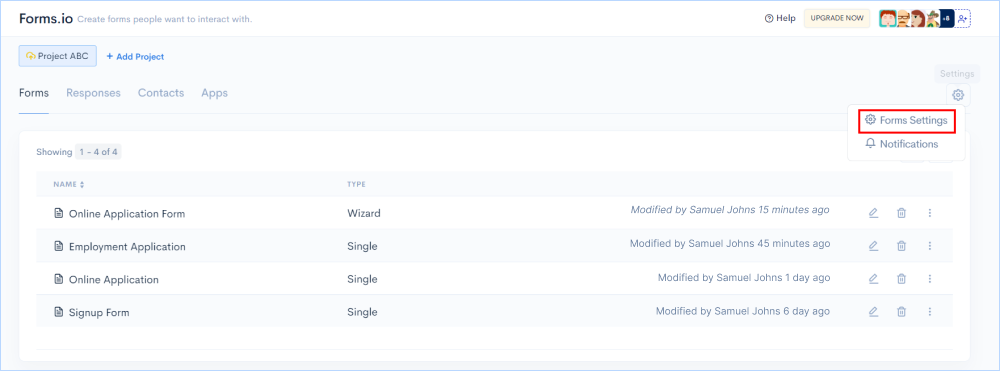
Click on the gear button on the right-hand side of the workspace > Click on Form Settings > Webhook API
Responses are sent in real-time to the URL which is given in the tab for webhook in the below screenshot.

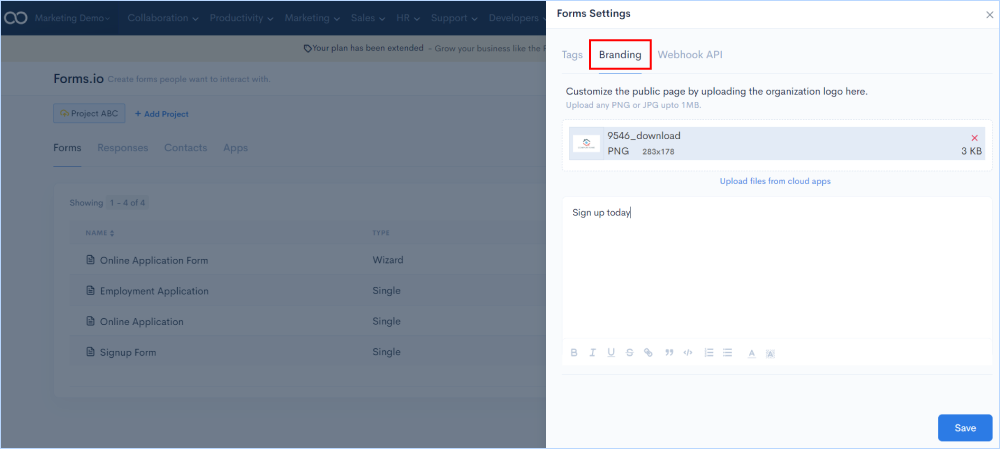
Make people aware of your product and services by customizing your form with logos and taglines. You can upload logos from your system or you can upload from any cloud apps. You will be also given an editor to write taglines and other descriptions to display along with the logo.
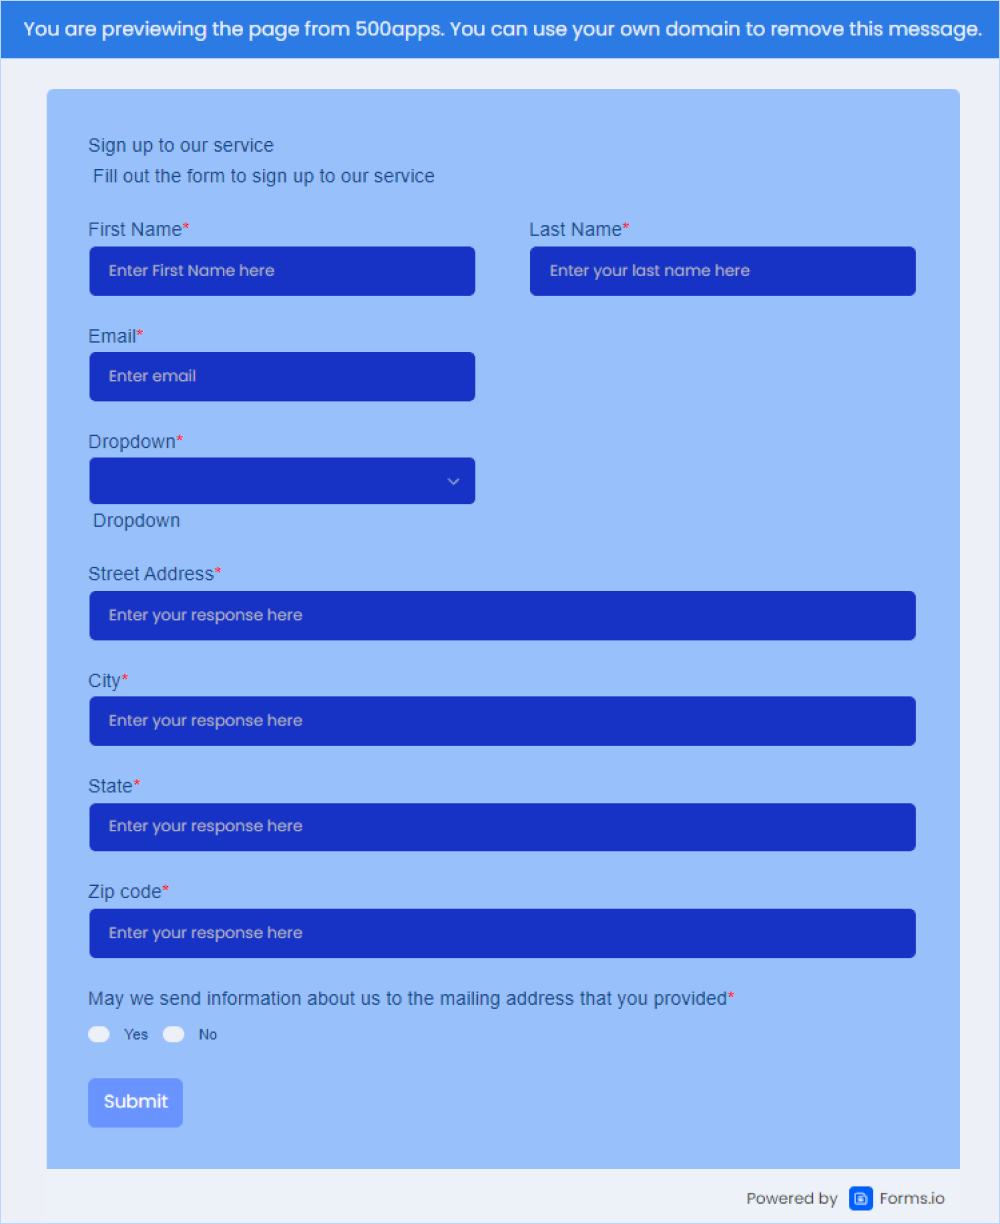
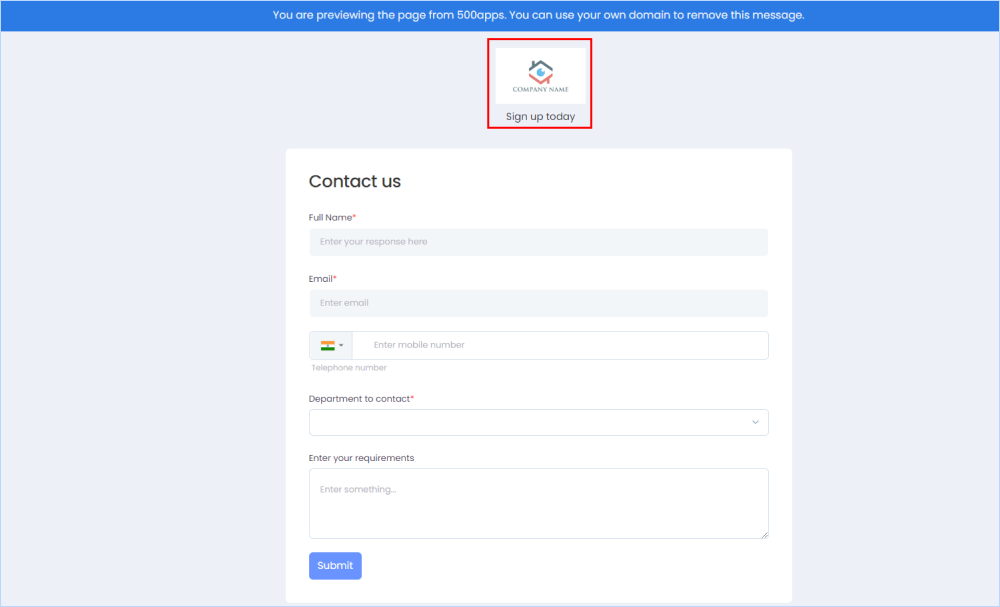
Here is a preview on how the public page with the form will be displayed to the end user.
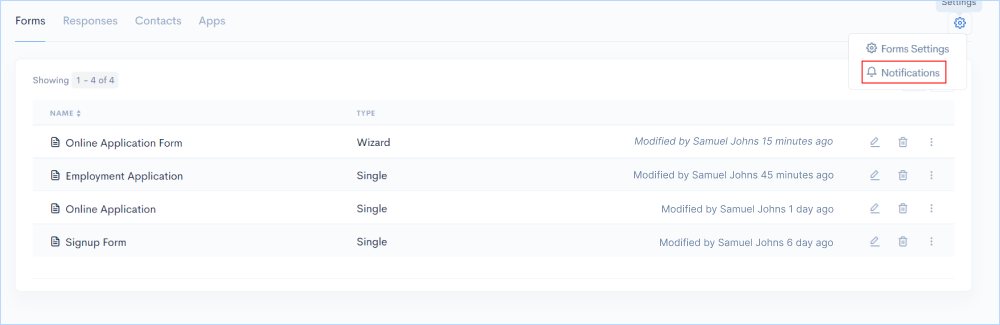
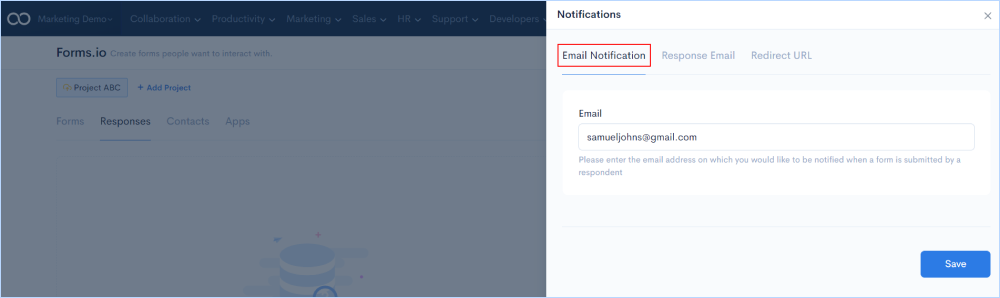
As an evaluator get email notifications to which you would like to be notified when a form is submitted by a respondent.
Go to the gear button on the right-hand side of the workspace > Click on Notifications > Click on Email Notification. Please enter the email address on which you would like to be notified when a form is submitted by a respondent.
If you want to send the user an email confirming that the form was submitted, go to Response Email tab and click on the enable button.
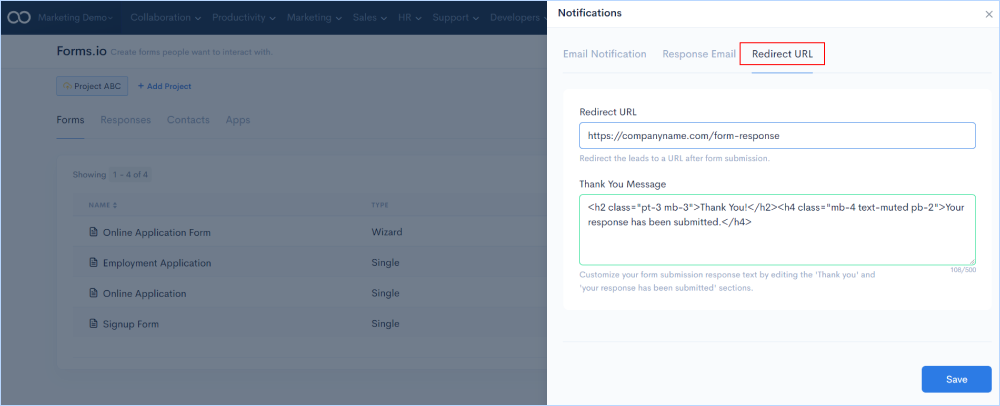
Once the form is submitted by the end user, you can redirect the user to a page displaying 'Thank you' message after the form submission. To do this go to Redirect URL tab and enter URL and display notes.
Here is a preview of the final redirected page after form submission.

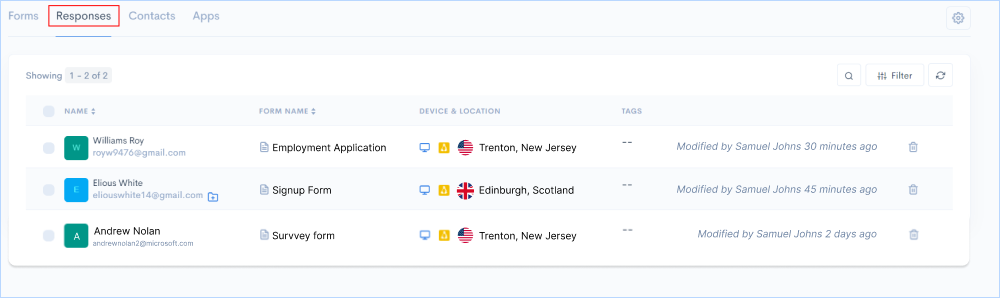
Collect all responses from users and store them in a central location so users can access them at any time. The responses can be further narrowed down by seeing how many forms have been submitted by email and how many have been submitted by embed code.
Go to Responses in the feature tab.
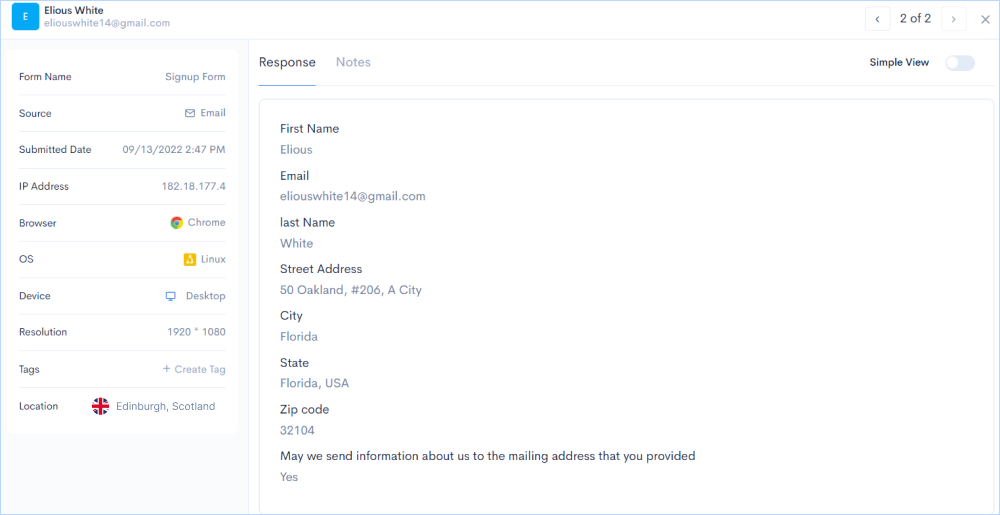
Get a comprehensive view of each response with complete details of the respondent such as Source, IP address, Location, Device, and more. To get this view click on any response tab.
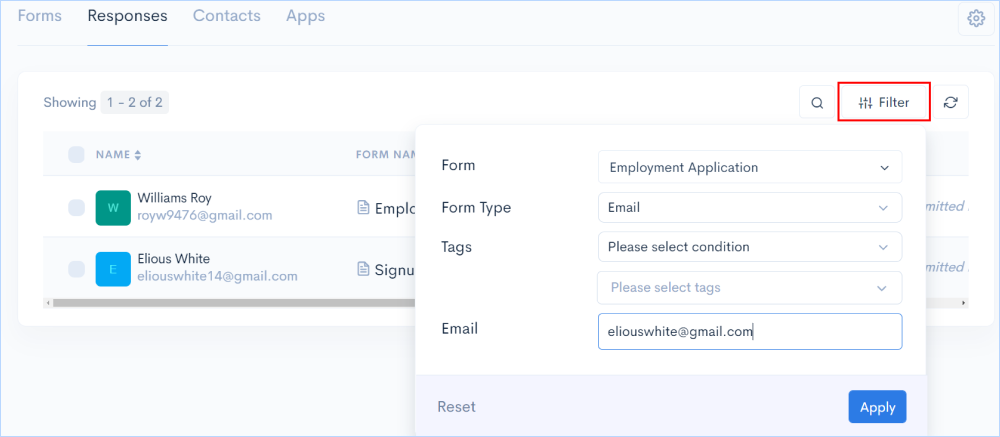
Filter responses by Form name, Type, and tags, and find the response you would like to evaluate. Reset the filters and start over with your search criteria by clicking the reset button.
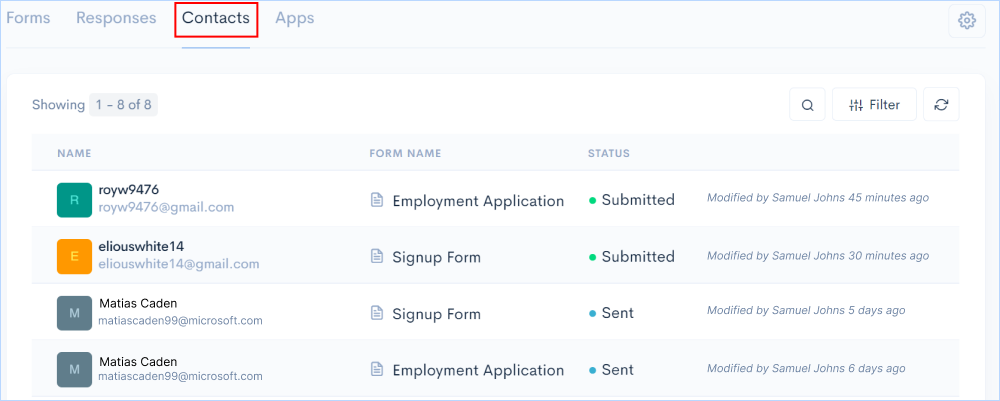
Retrieve all the contact details from the responses you received and store them in one central location.
Go to Contacts in the features tab.
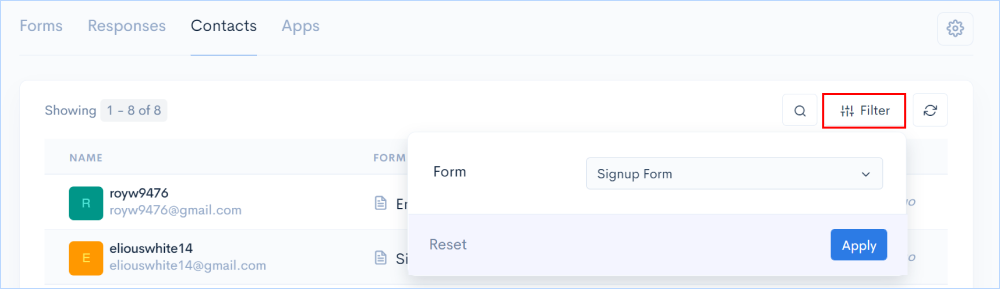
Filter contacts by inputting the Form name. Reset the filters and start over with your search criteria by clicking the reset button.
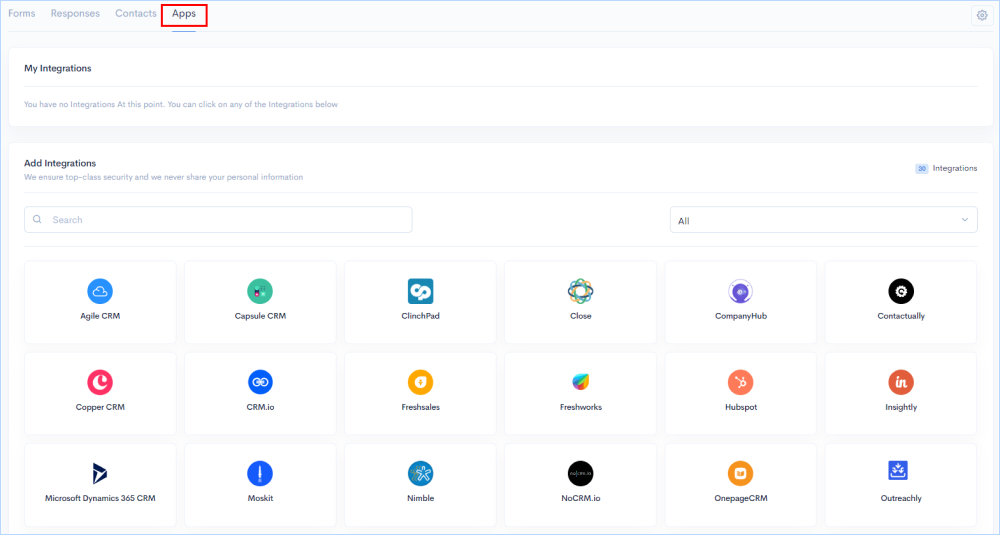
Integrate Forms.io easily with top CRM software and payment processing system. Check out all Form.io integrations today!
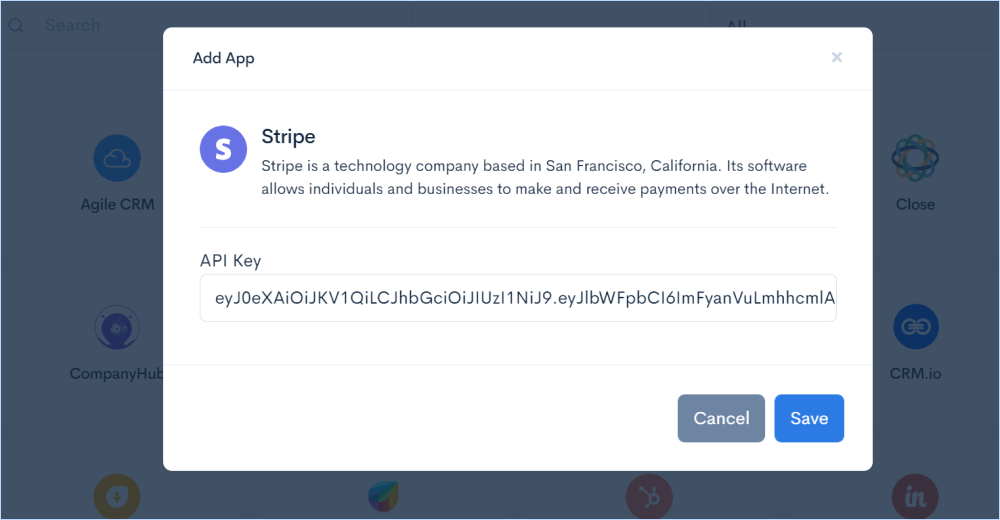
Go to Apps in the features tab. Find the complete list of CRM and payment systems that can be integrated with Forms.io from the Add Integrations section.
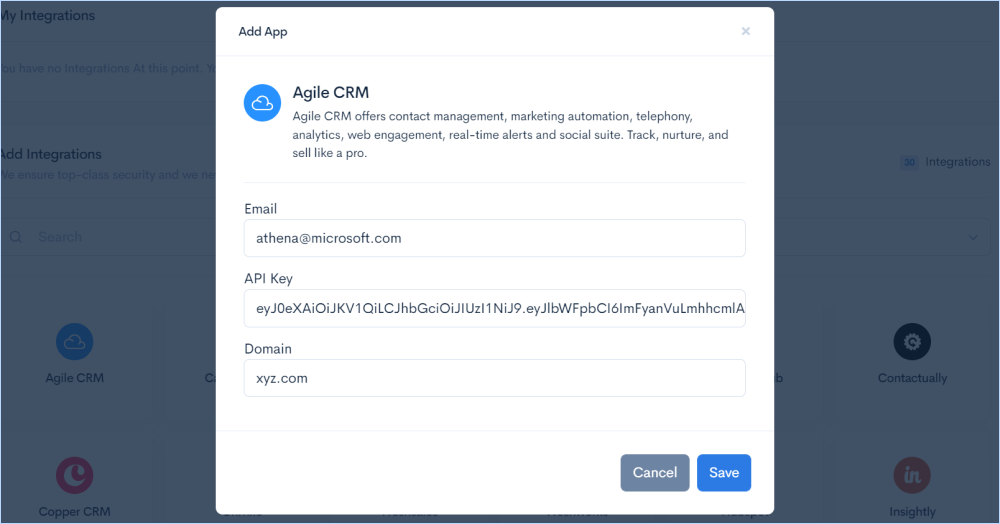
Manage all your leads collected from the form by exporting them to the best CRM software you use. To do this you need to first add the CRM from the list to integrate with the form.
From the Add Integrations section, click on the CRM that you wish to integrate. You will get the window to add API key and other relevant data to fill. Once the inputs are given, click on the Save button. Integration is set!
Send all the contacts of the leads you have received through forms to the CRM being integrated for better lead management.
Intially you should have created a project in CRM.io from the infinity suite of 500apps. The contacts you wish to send to the CRM will be stored in those specific projects in CRM.io.
Now go to Contacts tab in Forms.io. To export contacts to CRM, hover over any contact you wish to export and you will find an icon stating Add to CRM.
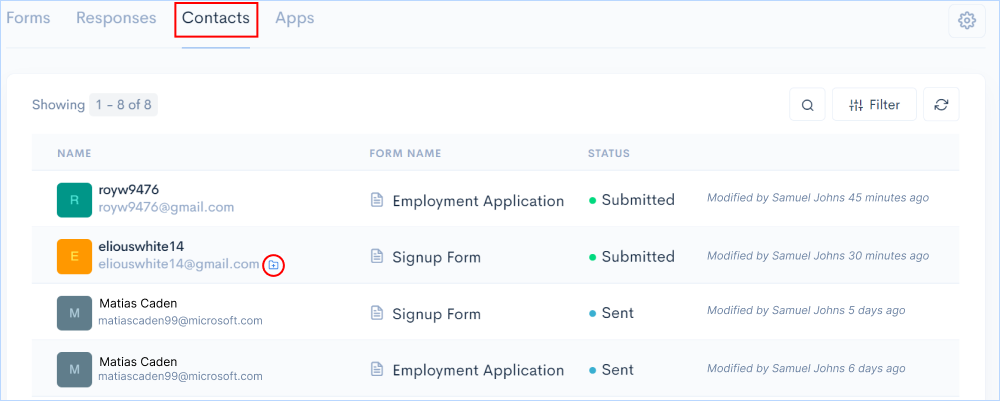
Click on the icon. You'll get a window to select the CRM app to send the contacts. Click on it and you'll see another window displaying the list of projects in CRM.io where you want the contact to be exported. Select the project and Save it.
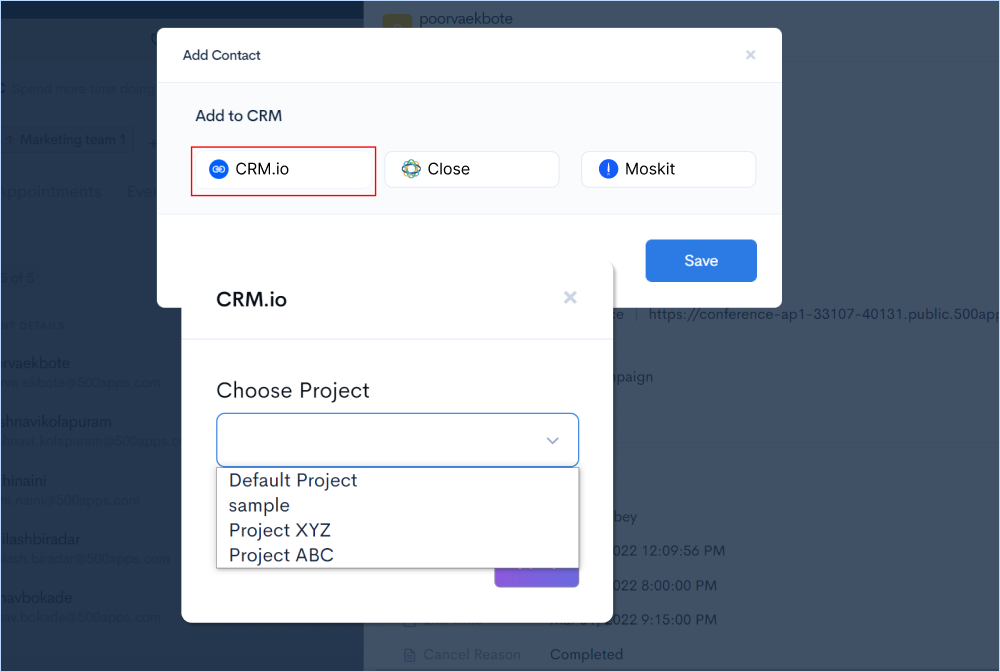
The contact is exported to CRM.io and you can open the app from the suite separately and get the list of exported contacts from the Contacts section.

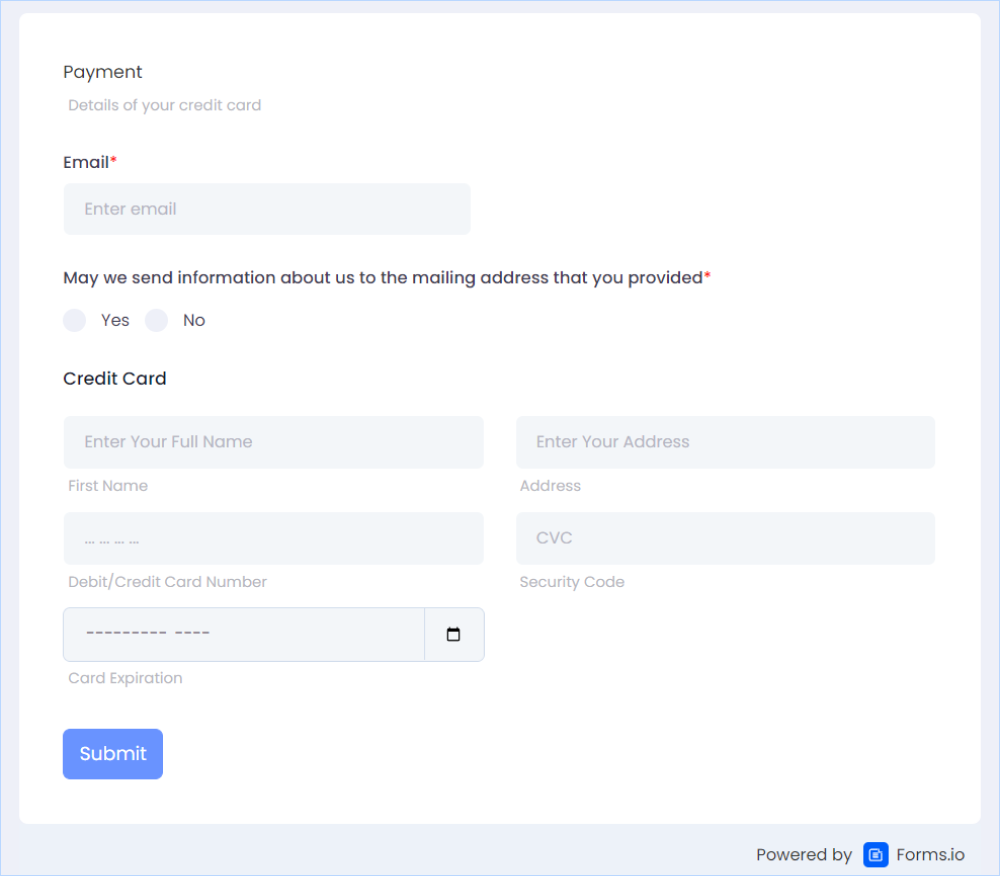
By integrating Stripe's payment gateway system, you can accept secure online payments directly through your forms. You can start collecting payments by creating a payment form after integrating Stripe with Forms.io.
Here is an example of a payment form created through Forms.io.
Go to the next level with ![]()
Get 50 other apps with Forms.io - Join the SaaS Revolution - 500apps, $14.99/user flat pricing, 24/5 Support (Phone/Email/Onboarding)
